

Countdown to Winter Break: 2 DIY Gifts and Decor
The holidays are fast approaching, so it’s time to get that gifting and decorating done if you haven’t already. You may complain that gifting and decorating are expensive and time-consuming, but they don’t have to be! With that said, here are two do-it-yourself (DIY) crafts to decorate with and give as gifts.
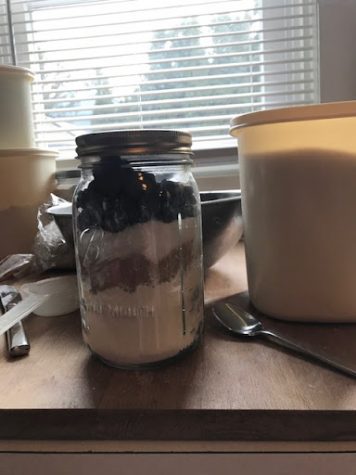
1. Cookie in a Jar
This is a fun little gift that you can whip up in no time that people are sure to love, since who doesn’t love cookies?
 Materials:
- Mason Jar
- 1 ¾ cups flour
- ¾ teaspoon baking soda
- ¾ teaspoon salt
- ¾ cup brown sugar
- ½ cup granulated sugar
- 1 ½ cup chocolate chips
- Decorating materials, such as ribbons and bows
Directions:
- Mix together the flour, baking soda and salt; spoon the mixture into the mason jar. Then, pack it down as evenly as you can.
- Spoon in the brown sugar and pack it down as evenly as you can.
- Spoon in the sugar and pack it down as evenly as you can.
- Spoon in the chocolate chips to fill up the jar.
- Close the jar and decorate as you please. I wrapped some ribbon around the jar and put a bow on top.
- Attach a page with the instructions (shown below).
Instructions:
Mix ¾ cup (1 ½ sticks) of butter, 1 egg, and ¾ teaspoons of vanilla extract in a large bowl. Slowly add the cookie mix until mixed well. Spoon out the cookies onto a baking sheet and bake for 9-11 minutes at 350℉. Let the cookies cool and enjoy!
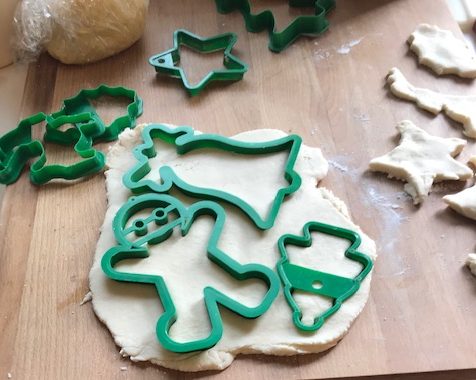
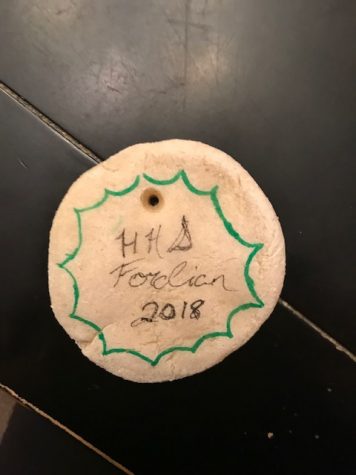
2. Salt-Dough Tree Ornaments
This is a super fun craft that you can do with your whole family. It’s easy, though a bit messy, and allows an opportunity to get creative.
Directions:
Mix 2 cups of flour, 1 cup of salt, and 1 cup of warm water until it forms a dough-like consistency. Spread some flour on a cutting board or other flat surface and roll it out to a thin circle and use cookie cutters to make fun shapes, or the rim of a glass for a circle. Be sure to poke a small hole through the tops to loop a ribbon through. Then, put them in the oven at 350℉ until hardened. Let them cool until they are cool enough to work with, and then decorate them as you please with markers, paints, glitter, and more. Let your creativity loose! Then, string a ribbon through the hole you made earlier, tie it around, and hang it on your tree!